Monday, 21 April 2014

Cosmetics Roll


Presenting the newest addition to my travel accessories range - the cosmetics roll case! My usual make-up bag is round, fat and full of empty eyeliners and funny coloured lipsticks that I never wear - I'm sure this is fairly standard! So I went on the virtual hunt for a cosmetics holder that would accommodate a scaled-down collection of war-paint and be easily stowed in my back-pack.


The use of a clear plastic wipe-able vinyl attracted me to this particular tutorial, since I've never worked with it before and saw this as an opportunity to not only have an easily cleaned make-up pouch, but to up skill myself too!


I've also been working with zippers and binding a lot recently and any chance to practice is really useful! I used two designs from one of my favourite fabric collections at the moment - 'Modern Folkloric' by The Henley Design Studio - and chose a contrasting yellow polka-dot for the binding to off-set the subdued colour palette.


I was a bit daunted about attaching the binding around the curve of the flap, but when it came down to it, it sewed up beautifully. I'm very proud! I've also found a new love and appreciation for hand-stitching, which I have always previously found a drag.

Maybe I've learnt to appreciate any task which allows me to sit quietly for a while without my brain working over-time on all the things I should be doing!


What do you think??


Wednesday, 16 April 2014

Neck Pillows


Hello! Wow, it's been a while right? You might be aware that I have been doing a spot of globe-trotting over the last three months, hence an extended period of absence on the blogosphere. With just two days until we return home to Christchurch, we are on 'back-to-normality' count-down here in Bangkok. This return to business as usual for me also includes blogging and sharing new developments here for friends and family (and possibly a few others who may happen across this page). 

Before we commenced our epic journey back in May, I had lined up a series of draft posts with photos of various projects I had been working on (mostly travel-related items!) so it makes sense for me to begin my return to writing by publishing these archived posts.


Today, I want to share with you some pics of a couple of travel pillows I whipped up before we left. As with most travel related items, these seem to be particularly expensive to buy in high-street shops, so I decided to save a few pennies and make some myself. They aren't necessarily a necessity for travel, but the pillows that are provided on most major airlines are generally useless and we knew we might be doing a few overnight bus/train journeys in Asia too.


I chose flannel for its softness and, yes, it's pretty darn cheap too! I improvised a pattern and used a soft poly-fill to pack them out. I also sewed in a little loop to allow us to hang them from our packs.

Can you guess which is mine??


Monday, 14 April 2014

A Home for a Harmonica


A few months ago, I acquired a harmonica. Since I've started learning to play the ukulele, I have gained a new-found confidence in the potential of my musical capabilities. I've had a peek into a world which I had previously felt I was too slow and unco-ordinated to be a part of. 

I'm still very much a beginner and progress is slow, but I am really enjoying discovering new abilities. As I'm going to be leaving my uke at home whilst we are travelling for three months, a harmonica is the perfect portable instrument which can tag along with us and provide some tuneful company on the road.

Typically, before I taught myself any tunes, I had to make my harmonica a cute case! Using a combination of hand-embroidered linen and scraps of fabric from my travel wallet, I based the case on a tutorial for a glasses pouch from Liberty's blog. Again, to be extra thrifty, I used a hair bobble for the elastic and a matching button from my stash.


So now my little harmonious harmonica can accompany me on my travels and provide sweet sweet music on train platforms, during long bus journeys and for nights when I can't get to sleep because it's ridiculously hot. Martin's going to love it!

Thursday, 3 April 2014

Hollyburn Denim Skirt

T-shirt - thrifted
Denim Skirt - handmade
Necklace - gift from my mother-in-law
Headband - handmade
Face - model's own


My last wardrobe-related post was over a year ago now and since I've resumed sewing lots recently, I thought it was about time I shared a handmade garment with you!

Unlike crafting, I wouldn't describe my relationship with making clothes as a harmonious one. I'm still very much a beginner and the phrase 'practice makes perfect' is hard to hear when you're unpicking something for the fifth or sixth time! Having said this, there is a certain sort of satisfaction that I gain upon completing an item of clothing that I just don't get after finishing a craft project.

It's kinda like, 'phew, that wasn't as easy as I thought, but I did it!' Kind of...

This week, I finished two items of clothing: a denim skirt and another Staple dress.


My skirt was made using a Sewaholic pattern - the Hollyburn. As usual, I ignored the warning on the pattern sleeve not to use anything but light-weight fabrics and opted for this medium-weight denim, largely due to a lack of choice in fashion fabrics in CHCH. Come on Global Fabrics and open in The Tannery already!

I also skipped on making a toile - much to my own detriment. Considering I have an extremely disproportionate waist to hip ratio, this was a very bad decision. The first time I tried the skirt on, it was huuuge on the waist. I took it in quite a lot before sewing in the zip, but it still sits better on my hips than my waist, which is a shame.


Apologies for the weird cropping - those are definitely my hands!


But now I know, I will probably opt for two sizes smaller next time! I'll be starting on another next week so hopefully I can make it fit much more snugly. 

I have also been making an array of wire-shaped fabric headbands this week, to help dress-up my locks as I go through a month of bleaching in order to eventually dye my hair either baby pink or lilac (more on that soon!) I've become a little bit addicted to making these as they are super simple and great for using up fabric remnants. I plan to make up a collection to take home and give as gifts to girlfriends :)


Tuesday, 1 April 2014

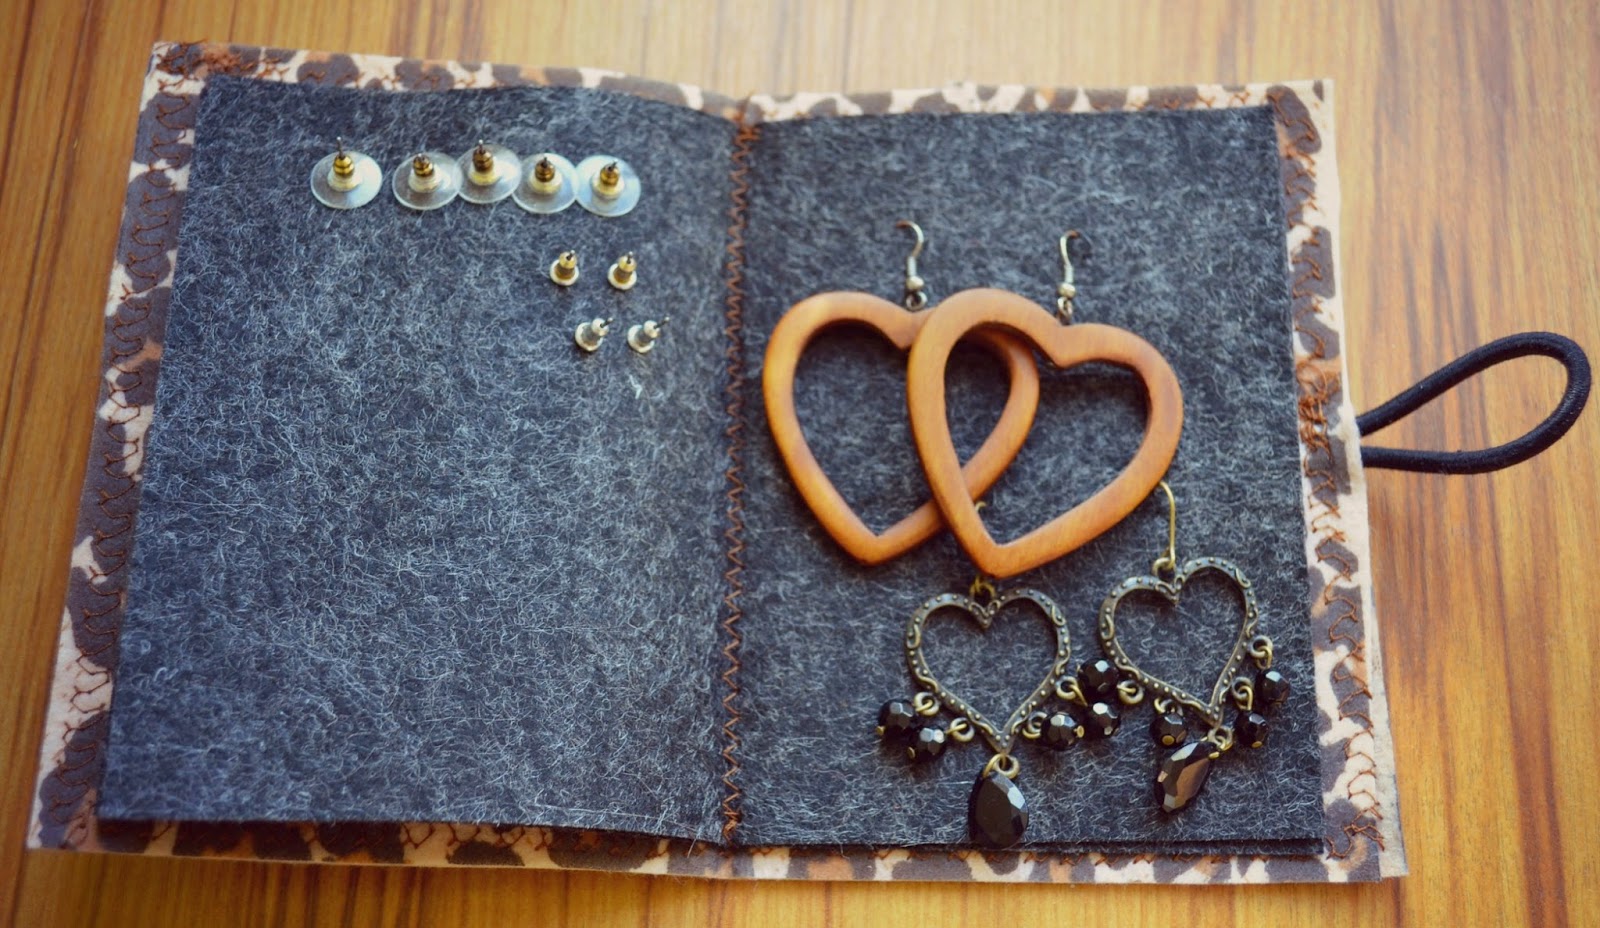
Travel - Earring Book


One of the things I usually struggle to pack in a space-saving fashion when we travel is my ever-growing earring collection. Since cutting my hair boy-short (or Justin Beiber short, as Martin prefers to call it), I seem to be acquiring more and more studs and danglies in celebration of my ears being on show all the time.


I came across this tutorial on making a felt earring book and gave it a go using animal-print felt for the cover and a lovely speckled firm grey for the pages.

I opted for an elastic closure - using a hair bobble for extra thriftiness - and added a leather button too. A super cheap project, at around $3 (£1.50) - can't go wrong! 


Making this book also reminded me that my sewing machine has more functions than just my default setting of a 2.5 straight stitch. I used a downward arrow stitch on the cover and a wide zig-zag to secure the pages - I just need to remember to change it back for when I'm stitching skirt side panels together!


Right, now to fill it full of earrings! Maybe I need to go buy some more...